Introduction
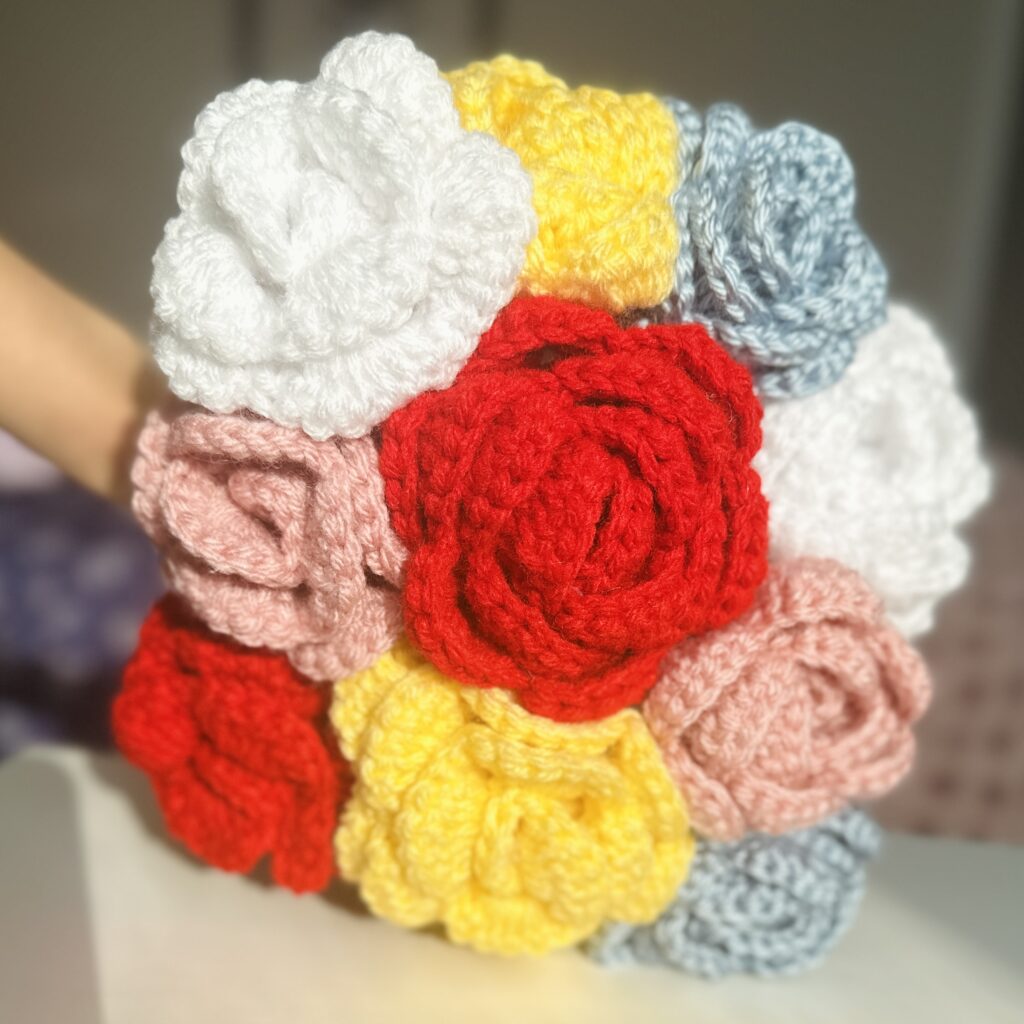
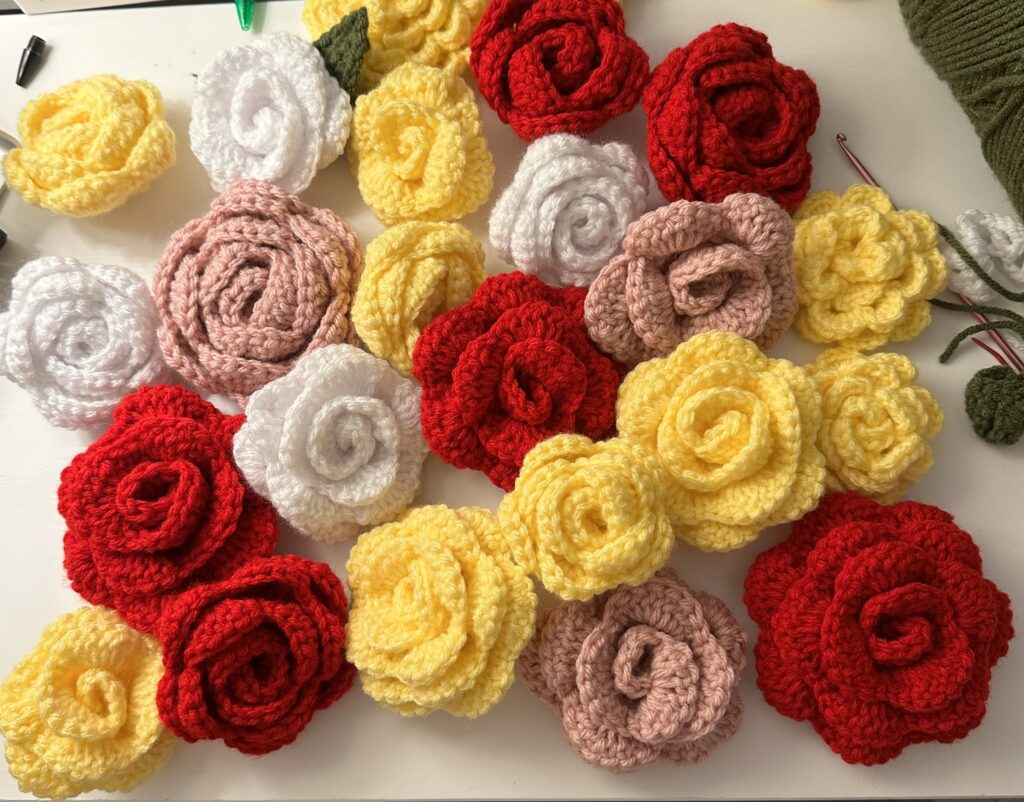
Looking for a fun crochet project that can also double as a heartwarming way to uplift your community from the comfort of your own home? Look no further than crocheting this adorable free crochet rose pattern for women’s shelters! Today, I’ll go over all the materials, basic stitches, and assembly of these cute roses.
Materials
- Yarn
- For this pattern, I’m using a #4 worsted weight acrylic-cotton blend yarn.
- You will need two colors: one for the flower and another for the stem.
- Look for OEKO-TEX Standard 100 certified yarns since those are certified safe for children, allergies, and sensitive skin.
- The type of yarn fiber used is not crucial, so feel free to use any fiber type (acrylic, cotton, etc.) If you’re curious, this article can help you learn more about what fiber type works best for your projects.
- Hook
- Choosing a crochet hook is a trial-and-error process. I recommend buying a cheap set of hooks at first, seeing which ones work for you, and then investing in one of the Boye or Susan Bates ones.
- Start by making a swatch (foundation chain with a few basic stitches) with the hook size recommended on the label. If you like the result, use that hook! If not, size down or up and make another swatch. Continue this process until you like the look of your stitches.
- Yarn/tapestry needle
- Floral wire (for stem)
- Hot Glue (for stem)
Stitches Used
Chains (ch)
Chains are frequently used to begin projects in the flat. We will use them here to make the foundation for our flower and the V-stitches that give the flowers their shape! Here’s my tutorial for them.
Single Crochet (sc)
Most crocheters begin with a single crochet, which is the first main stitch. We’ll use this basic stitch for the final petal row. Here’s my video tutorial on working single crochets.
Double Crochets (dc)
Double crochets are the main stitch in this pattern, allowing us to make the base V-stitches and the petals. Check out my video tutorial here.
Body Pattern
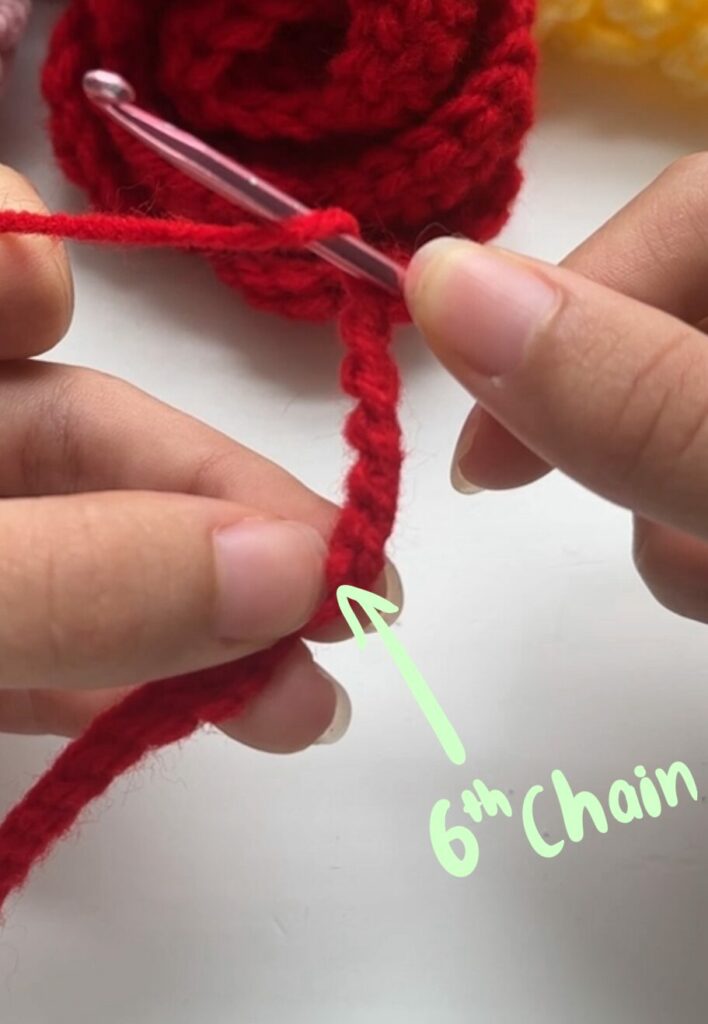
Foundation row: ch 31 for a small rose. ch 43 for a medium rose. ch 52 for a large rose.
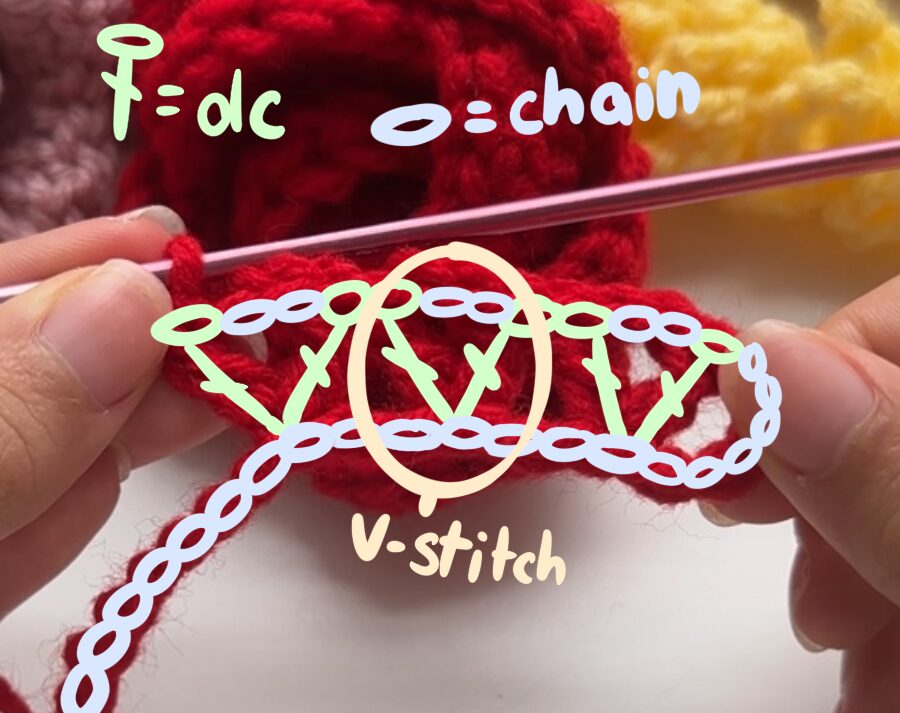
Row 1: dc into the 6th ch from the hook. Ch 2. Dc into the same ch we made our first dc into. (See how it looks like a V? This is our first V stitch!)
[skip 2 ch. dc into the 3rd ch from the last dc. ch 2. dc into the same foundation ch.] Repeat between [] until the last st of the foundation row.
Row 2: Turn your work and ch 3. 2 dc into the upside-down triangle-shaped gap made under the ch 2 from the previous row. ch 2. 2 dc into the same upside-down triangle-shaped gap. (A thicker version of the V-stitches we made in the last row!) [2 dc into the next upside-down triangle-shaped gap created by the ch 2 in the previous row. ch 2. 2 dc in the same upside-down triangle-shaped gap.] Repeat between [] until the last triangle gap. Finally, make a final thick V-stitch into the gap left by the ch 6 between the foundation and first row.
Row 3: ch 1. sc into the last dc before the ch 2. 7 dc into the upside-down triangle-shaped gap under the ch 2 of the previous row. (This made your first petal!) [sc into the 3rd double crochet after the petal, 7 dc into the next upside-down triangle-shaped gap] Repeat between [] until the last petal. Since there are no dc after the last petal, sc into the last ch 3 between the first and second rows. Now, cut the yarn, leaving a long (~12 in.) tail for sewing.
Sewing Basic Rose
Open Rose vs. Closed Rose
Thread your yarn needle through the tail from the end. Set it aside for now. Make sure that the end with no tails is farthest from you.
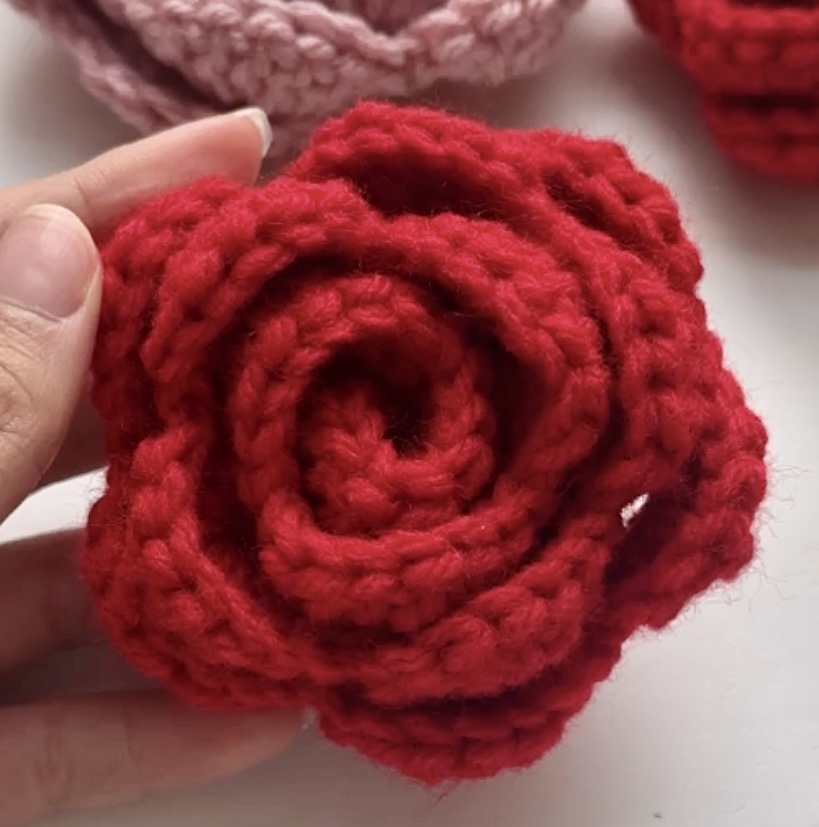
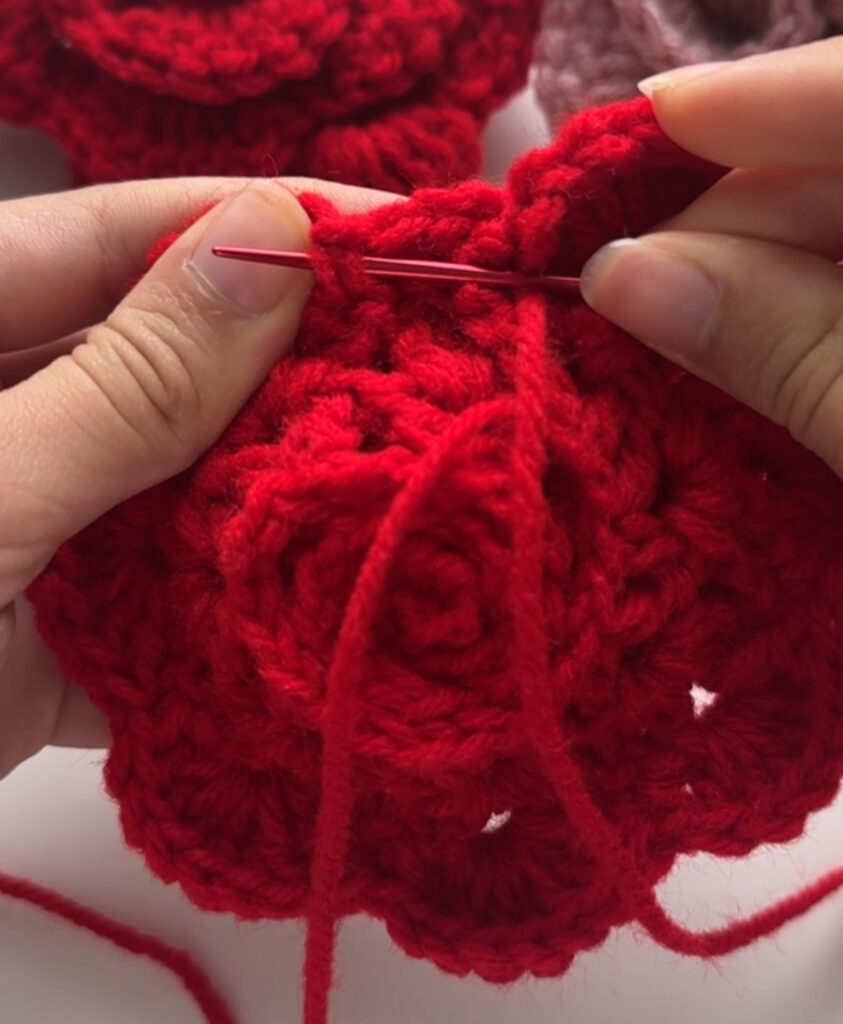
Open roses (Image 1): Flip the rose body over so that the wrong side of the double crochets is facing you. You can tell it’s the wrong side since the double crochets will have bumps at the top, and the petals will be on the rightmost side of the body.
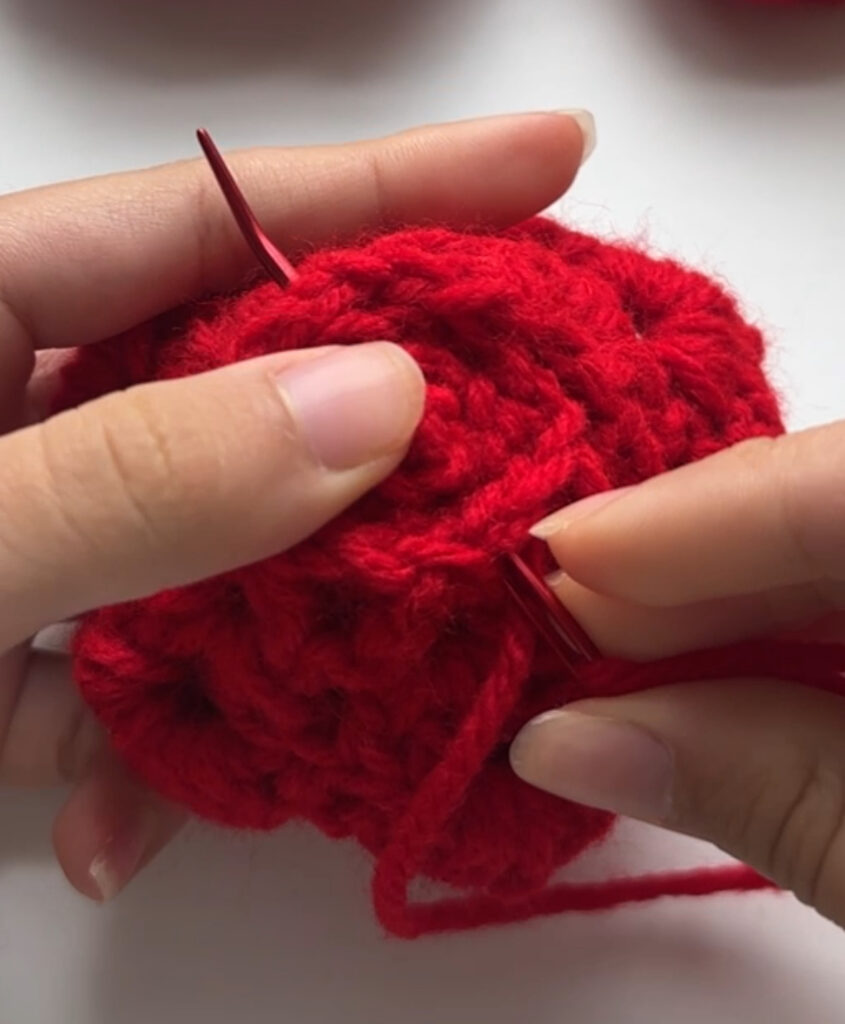
Closed roses (Image2): Make sure that the correct side of the double crochets is facing you. You can tell it’s the correct side since the double crochets will not have the same bumps at the top as the wrong side, and the petals will be on the leftmost side of the body.
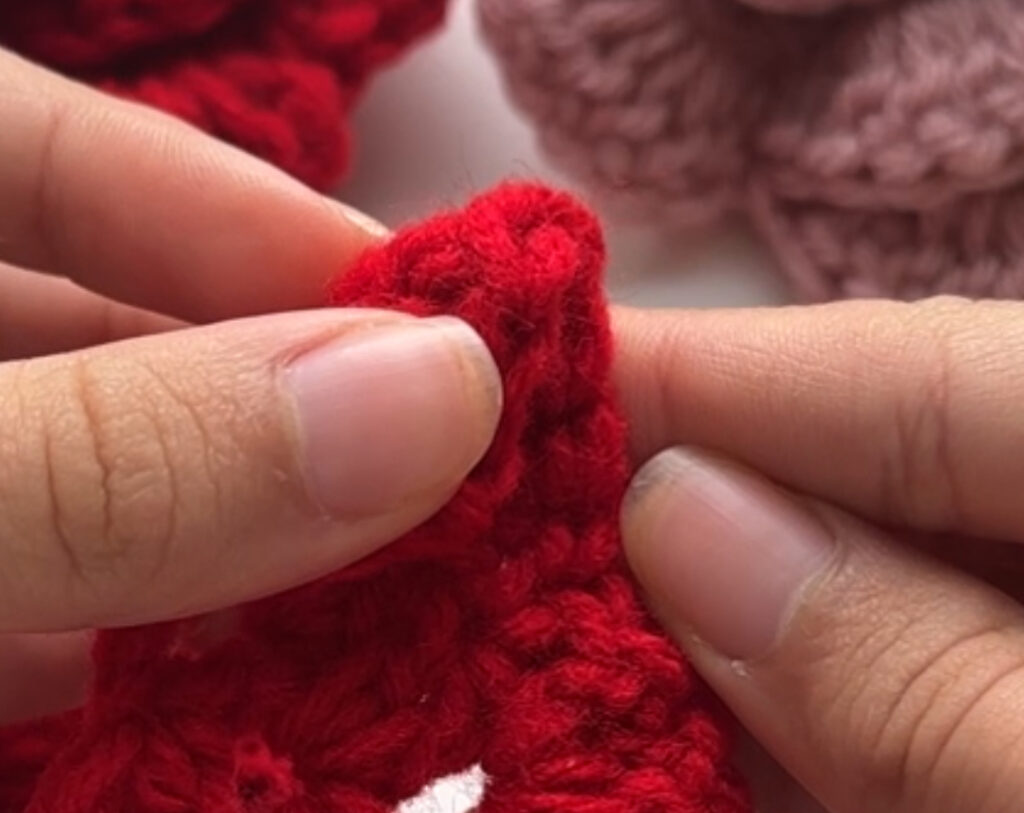
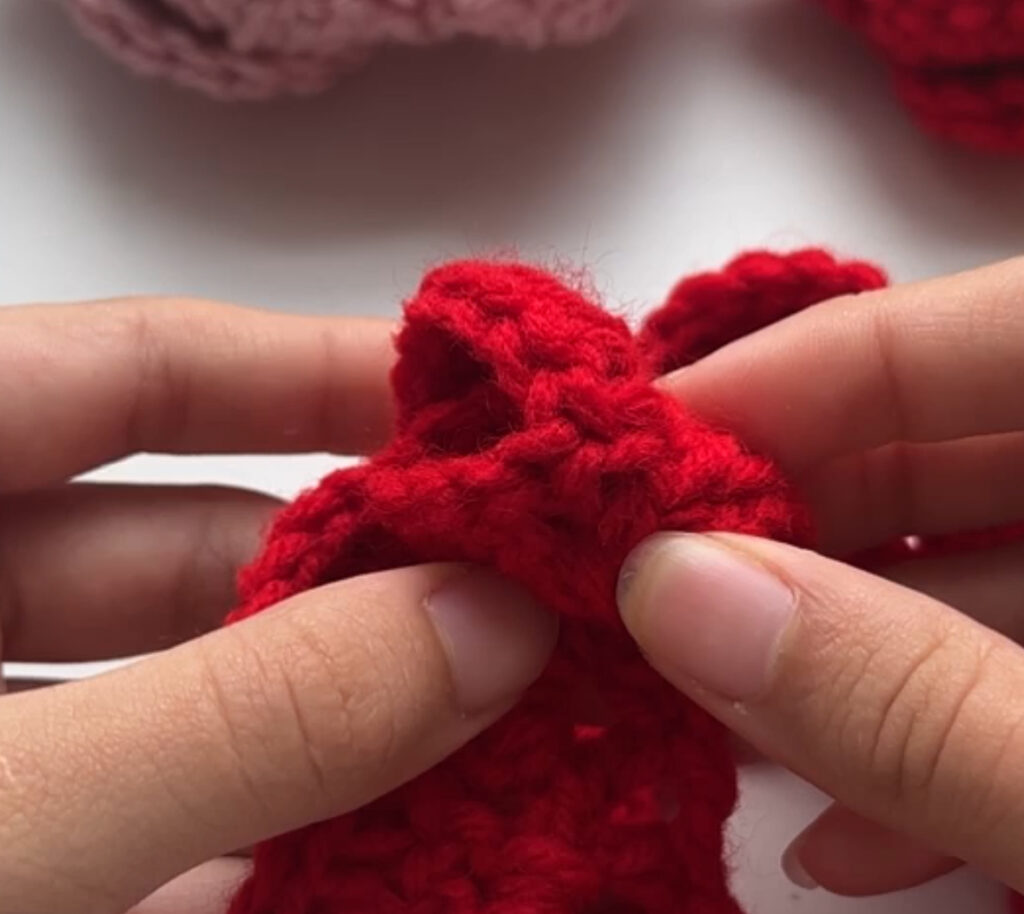
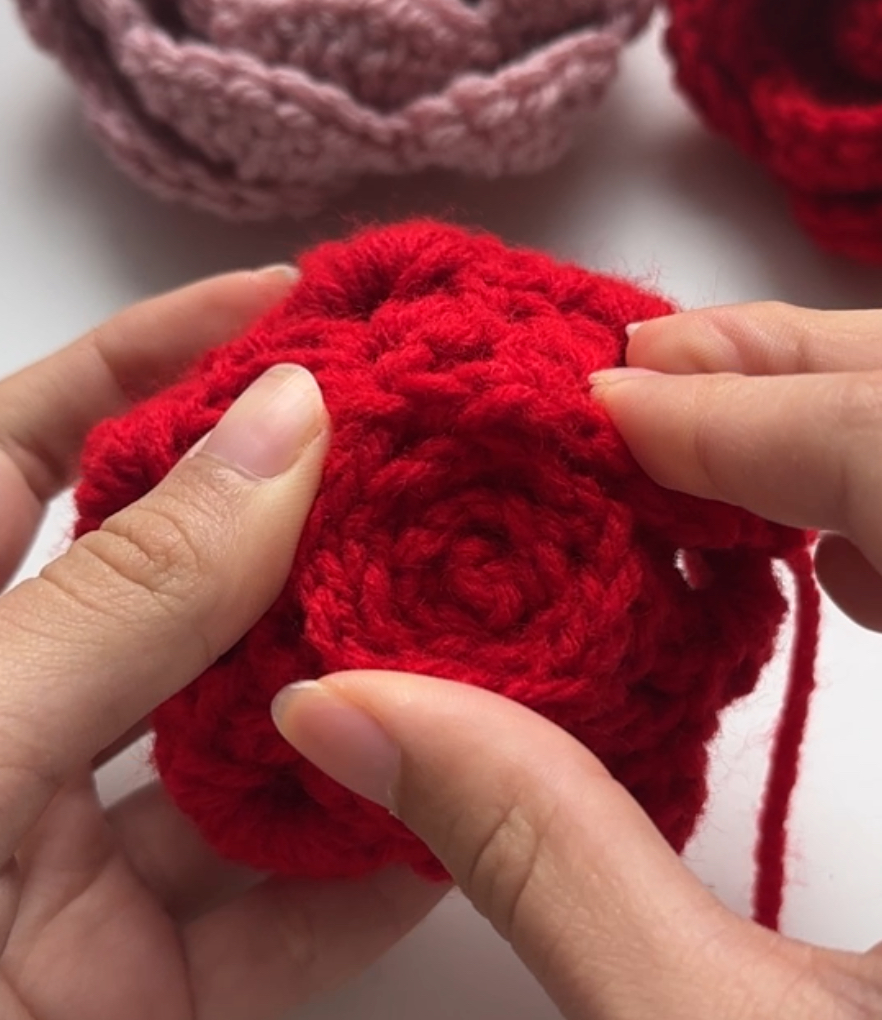
Then, fold the petal farthest from you (the one at the end with no tails) in half towards you (Image 3). Now, begin rolling the flower toward you, making sure that the foundation row stays aligned and begins forming a spiral, as shown in Images 4 and 5. Continue the rolling motion until having reached the last petal.
Sewing: Using the tail attached to the last petal we left for sewing, make a small, random stitch to secure the last petal in place (Image 6). Then, work your way down, making stitches until reaching the base of the flower. Flip the flower upside-down so that the spiral made from the foundation chains is facing you. Drive the needle back and forth the entire foundation spiral at different angles, making long stitches to help secure the flower in place (Image 7). Once you have driven your needle back and forth through the base spiral a few times, gently tug on the petals to make sure the flower is secure. If secure, cut the tail and use the back of your crochet hook to push the tail into the flower, making it invisible.
If the tail from the slip knot is still visible, use your crochet hook to bring it back in and cut any excess off.

Attaching Stems
Get your floral stem wire, hot glue gun, and stem-a colored yarn ready!
Turn your flower upside down and make note of where you want your stem to come out of. Stick the stem into the flower first without glue. Once you’re sure that the stem will go into the flower at that point, lay a sizeable dot of hot glue right where you want to stick the stem in. Put the stem in the flower before the hot glue dries. If you feel like the stem isn’t secure as is, feel free to make a ring of hot glue around where the stem meets the base of the flower for extra security. Now that we have attached the stem, we can move on to wrapping the yarn around the stem.
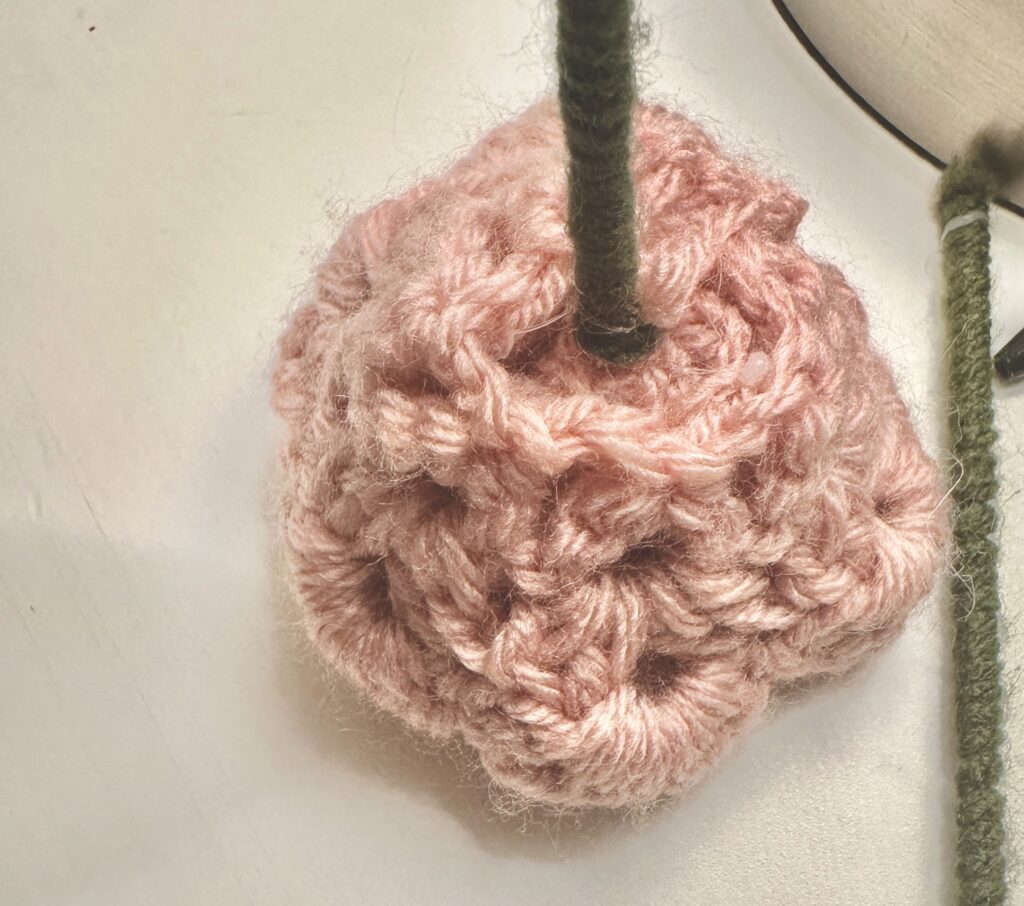
First, put a dot of hot glue wherever the base of your flower meets the stem. Carefully, making sure it does not thoroughly get burned, put an end of the stem-colored yarn on top of the dot of hot glue. Use a tool such as the back of a crochet hook to push the yarn into the dot of hot glue, making sure that it won’t get ripped out. When the hot glue with yarn is fully dried, start twisting the yarn around the stem tightly. Do this for the rest of the stem, making sure to wind the yarn tightly around the stem. Finally, put some dots of hot glue at the end of the stem and carefully wrap the yarn around it to secure it. Lastly, cut the yarn, lay a dot of hot glue at the tip of the stem, and use a tool such as the back of a crochet hook to push the end of the yarn into the hot glue. This will make for a neat end.
Donating to Women's Shelters

After successfully creating your beautiful crochet roses, it’s time to make a difference and support women’s shelters through volunteering from home using this crochet rose pattern. Take the first step by exploring nearby shelters in your area to familiarize yourself with their donation guidelines and choices. Once you’ve pinpointed a suitable shelter, connect with them through email or phone to gather information about their current requirements and ways you can assist. Handmade donations, including crochet roses, are highly appreciated by these shelters as they convey a sense of compassion and unity. Package your contributions carefully and consider adding personal touches like handwritten notes or inspirational quotes. Lastly, coordinate with the shelter to organize the delivery of your donations.
Read More!
AP Calc BC Unit 9 Comprehensive Review Resources
AP Calc Unit 9 Review Intro Welcome to the Unit...
Read MoreAP Calc Unit 3 Comprehensive Review Resources
AP Calc AB/BC Unit 3 Review Intro Welcome to the...
Read MoreAP Calc Unit 2 Comprehensive Review Resources
AP Calc AB/BC Unit 3 Review Intro Welcome to the...
Read MoreLearn to Crochet Beanies for Preemie Babies Now! – Crochet 4 Good
Intro Crocheting for charity offers a unique opportunity to make...
Read MoreWritten by Diana Moya Lapeira
As a Costa Rican teen living in Miami, I am passionate about helping others and giving back to my community through fundraising and volunteer work.


